
 It’s time for the Renaissance Festival again, and of course the costumes the children wore last year are unsuitable for this year. My husband sweet-talked me into making bodices for the children. I’ve made dozens of these, but the necessity of making them, often at the last minute, has sucked the joy out of it for me.
Here’s how I did it:
Step one, find a t-shirt you’re willing to sacrifice. I wasn’t able to find the ones I set aside specifically for this purpose, so I ended up using tank tops, which didn’t work as well.
Step two, put the t-shirt on the girl and wrap with duct tape. Draw lines where the vest should go with a sharpie, then draw along the curves. This takes some knowledge of how patterns are put together. Cut the shirt off the girl.
Step three, place the cut pieces on paper and trace around them. Make the pattern out of the average of these two pieces. You have to remember seam allowance (naturally) but you also have to leave extra space at the top of the shoulders, as these never align properly. You also need to leave extra where the grommets are going to go.
Step four, cut out pieces. I used an old velvet dress for the black (I had to tear out eight darts, which made me grumpy.) I used the lower half of cheap Ikea curtains for the lining.
Step five, sew pieces together and make sleeve for boning. For boning, we always use 1/2 inch cable ties, trimmed into curves at the end. The standard boning you get at the cloth stores doesn’t hold up very well, and it doesn’t have the support you need for a hefty woman. For a generously bosomed woman, you can use up to four pairs of boning. For my tiny children, I used only one pair.
Step six, sew backs to fronts, leaving shoulders and front of bodice open. When this is done, you have to turn it inside out (difficult if you haven’t left enough room) and press the seams.
Step seven, hand sew the open seams, including the front. This takes a special fitting, to see where the shoulders match up and to decide how tight you want it. If the fabric isn’t suitable, it will stretch out of shape (again, it’s worse on more zaftig women) and you’ll need to make it extra tight. My kids are beanpoles, so I just made it fit like a vest, not like a bodice
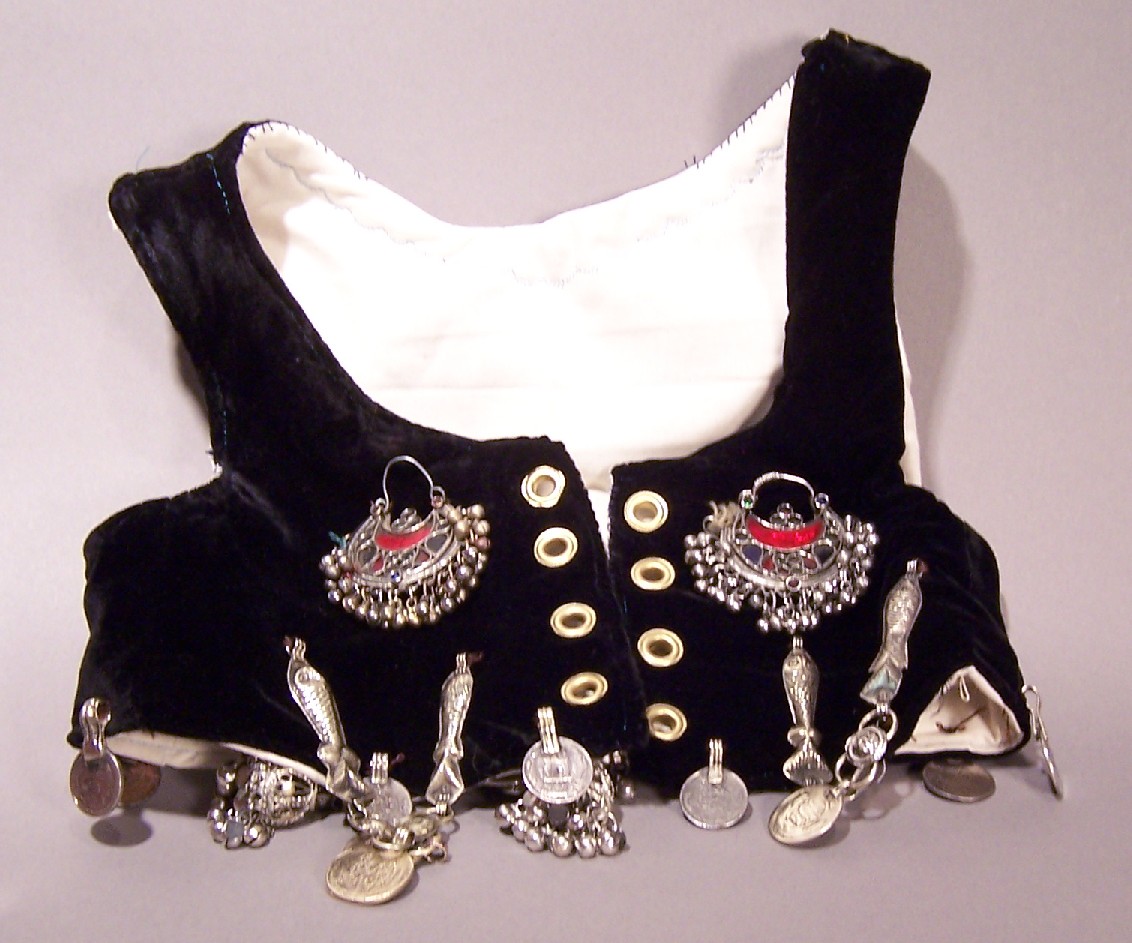
Step eight, insert the grommets. We have the grommets and the tool for inserting them, but the awl for punching holes has died from overuse. I had an awl of the right size that I bought for bookbinding, and I donated it to the cause. (My husband had to make many of these bodice/vests, for the dancers of his troupe).
Step nine, sew the seams. I used decorative stitching and colored thread so I could tell the kids’ vests apart.
Step ten, sew on jewelry. I bought this Kuchi jewelry at the Tucson Gem show. It’s surprisingly expensive, considering how cheap the metal is.