• Home
  • About Catherine Cheek
  • Writing Resume

Kater’s Art

artblog and writing resume

Category:

  • 48 Birds
  • alternart
  • Art Journal
  • books
  • collage
  • doll/faeries
  • drawing
  • Glass
  • henna
  • pottery
  • Printmaking
  • shrine
  • smiley ball
  • Tiles
  • Uncategorized
  • wood

Archives:

  • July 2010
  • June 2010
  • May 2010
  • April 2010
  • March 2010
  • February 2010
  • January 2010
  • December 2009
  • November 2009
  • October 2009
  • September 2009
  • August 2009
  • July 2009
  • June 2009
  • May 2009
  • April 2009
  • March 2009
  • February 2009
  • January 2009
  • December 2008
  • November 2008
  • October 2008
  • September 2008
  • August 2008
  • July 2008
  • June 2008
  • May 2008
  • April 2008
  • March 2008
  • February 2008
  • January 2008
  • December 2007
  • November 2007
  • October 2007
  • September 2007
  • August 2007

Blogroll:

  • Amalia Fisch
  • Black Wren Morris
  • Bridget Cherie Harper
  • Coop De Grace
  • Ecstatic Days
  • Endicott Studios
  • Glass Maze
  • Jerome Stueart
  • Keyan Bowes
  • Kolby
  • Livejournal
  • Lucy Snyder
  • My Etsy Shop-Scarletcrow
  • Nick Wolven
  • The Blatantly Obvious

Meta:

  • RSS
  • Comments RSS
  • Valid XHTML
  • XFN

Strive Book

May 25th, 2009 by admin

strive-book-cover.jpgstrive-book-back.jpg

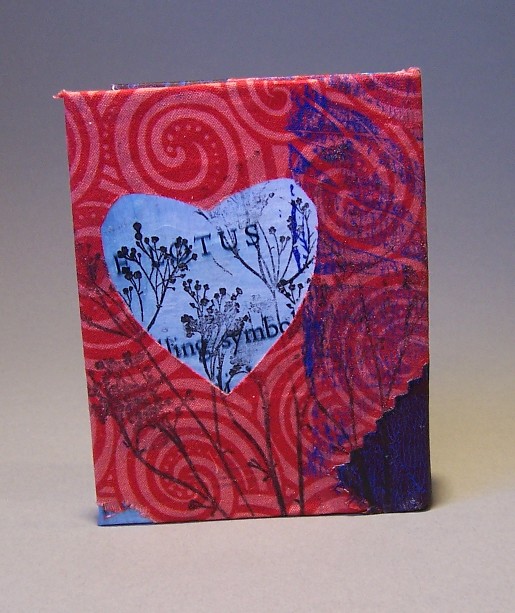
With this book I started once again with calico pasted to typing paper. The page was a sheet from an old manuscript, but the text is not visible.  I tried to do a second print from the tree monoprint, but it didn’t  take very well.  I used an onion bag to put some texture on, painting through it, and put some random blotches of paint as well, but it didn’t look like it was going anywhere good. 

In the past, laying painted paper towels over another surface has been great at producing a semi-translucent textural wash-type effect.  I had a piece of paper towel that was the right color pattern, though in retrospect it would have been better to divide it into a single layer instead of using both plys.  

After pasting the towel down to the calico with acrylic medium, I took a toothbrush and rubbed it over the surface to enhance the texture.  This wavy pattern in turn encouraged the fish motif.  After it dried, I sanded it lightly, which brought out the texture and roughened the surface to make adhesion better.


I had the tag left over from a sale on scrapbooking supplies, and wanted to put a quote on it.  If I’d been able to fit it all, I would have liked to put the quote “the race does not always go to the swiftest”.  For me, this piece is about perseverance—a trait writers must have if they are to succeed.  Since that wouldn’t fit, I chose one word, “Strive” and stamped it on with pigment based ink. Again, I had to seal it with clear embossing powder to keep it from smearing.


To highlight the tag, I used a piece from an old movie poster.  Bonus points if you can guess which one.  In retrospect, it would have been nice to have an additional 3-D embellishment (like a small fish charm) above the tag, but by the time I’d realized that, it was too late to sew anything on.

Before I attached the cover to the inside of the book, the cover only had one fish (the orange one.)  Once it was glued over the spine and fastened, it seemed a little empty, so I cut out another fish and let it wrap around the spine to connect front to back.

Posted in books | 2 Comments

Nightmares in Pleasant Dreams

May 17th, 2009 by admin

reading-ad-sm.jpg

This is a sign I made for the reading at Wiscon that some fellow writers and I are going to do.  I started with an old piece of matboard that I’d painted with several layers of acrylic.  I believe it had a basecoat of reddish brown, followed by gesso and sage green, but it was so long ago that that might be wrong. 

Using a wide nib calligraphy dip pen and some waterproof ink, I wrote “Nightmares” in an old fashioned calligraphic script. Underneath that, I wrote “In pleaant Dreams” in what was supposed to be copperplate but ended up looking like bad cursive.  This was also in waterproof ink, but using a finer point pen.

I printed a stamp of the dandelion silhouettes with pigment ink, and while waiting for that to dry, mixed some interference red paint with gel retarder. The mehindi-type designs in the corners are also a purchased rubber stamp.

I’d printed out the information on porous block printing paper that I’d cut to 8 1/2 by 11 so that it would fit in the laser printer.  After choosing the text that looked best, I cropped it to fit.  The original plan was to tea-stain it, but that would have reduced the contrast–a major disadvantage on a functional piece.  Instead I found some art paper that complimented the sage green and coppery tones of the background.

By adhering it to a rectangle of matboard, I ensured that the piece would have depth, and scans have a tendency to exaggerate depth in a piece.  I polished a piece of copper wire and bent it into a spiral, which created a second focal point and draws the eye to the most important part of the piece.

The reading itself should be very fun.  If anyone who reads this is going to Wiscon over Memorial day, please stop by and see our reading.

Posted in alternart | 1 Comment

Lotus Skeleton Book

May 12th, 2009 by admin

Lotus Skeleton CoverLotus Skeleton Back

I’ve learned the that easiest book cover material is thin cotton adhered to a typing-weight paper back.  So for these three books, (Remember book, Strive book and Lotus-skeleton book) I started out with three different calico-weight scraps of cloth and glued them onto misprinted pages. 

This piece of cloth is pink and red, and it had a hole missing because my children had used it to make a coat for a stuffed toy.  I cut an additional hole in the shape of a heart, and since I had decided to use the burgundy taffeta scrap, I cut a heart-shaped hole in that as well.  By good fortune, one of the holes lined up with the word “Lotus” from the photocopy underneath.

Once I have the background, my next step is to layer on some additional texture.  I had mixed up blue-violet paint with gel retarder for a block print, so I rolled out the rest of it and used some rubber-tipped tools to scrape away branches, forming the monoprint of a bare-leafed tree.  I really love silhouettes of trees without any leaves.  It seems like a simple thing to draw, but for some reason, mine never look as random as photographs.

Since I already had the tree shape, I wanted to echo it on the non-printed half of the cover. I’d recently purchased a rubber stamp of what looks like the silhouette of Queen Anne’s lace.  It had no backer, and stamping proved difficult, but even repeated it lookd okay.  Since I used pigment based ink, which I’ve learned, never, ever, ever, ever dries when you use it on cloth, I had to seal it by using clear embossing powder. This gives the ink a raised appearance, and also keeps it from smudging your fingers black every time you touch the cover.

I wanted to try some laser-printer transfer methods, so I warmed up the iron and tried to do a heat transfer of some text.  As near as I could tell, that did exactly nothing, so I printed out my motif on laser decal paper instead.  It transfers easily and quickly, though it feels rather fragile and poorly adhered, so it needed a once-over with our old pal acrylic medium.

To make the skeleton embellishment, I started with a thin sheet of aluminum and a plastic skeleton toy from a Halloween themed birthday party. I taped the skeleton on the back of the metal and rubbed it with burnishing tools until the details came out.  I’d just bought some new alcohol based inks that begged to be played with, so the skeleton got cranberry ink as a background color.  Unfortunately, it didn’t bring out the details very well.  A little sharpie helped, but not enough.  But sometimes when you can’t make something sharper, smudging it is just as good.  A little rubbing with steel wool made faint scratches in and brought the image to a level of abstraction equal to the ink.  Of the three books I did this session, this is my favorite.

Posted in books | No Comments

Smiley Ball 3

May 6th, 2009 by admin

smiley-balls3.jpg

This one had something weird happen with the glaze that makes it look diseased.  It has thin bubbles that break when you touch them, leaving ridges that cut like obsidian.  If it had been a functional piece, I would have had to get rid of it, but as garden art it works fine.

Posted in smiley ball | 1 Comment

 
Wordpress Themes by and Website Templates by Blogcut