• Home
  • About Kater Cheek
  • Writing Resume
  • Contact

Kater’s Art

artblog and writing resume

Categories

  • 48 Birds
  • alternart
  • Art Journal
  • books
  • Clarion
  • collage
  • doll/faeries
  • drawing
  • Glass
  • henna
  • Postcard
  • pottery
  • Printmaking
  • shrine
  • smiley ball
  • Tiles
  • Uncategorized
  • wood

Books!

  • Dayrunner
  • Seeing Things
  • Treemaker

My other sites

  • Occasionally Offensive

Meta

  • Log in
  • Entries RSS
  • Comments RSS
  • WordPress.org

Silkscreen cards

April 26th, 2011 by Kater

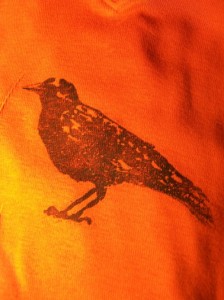
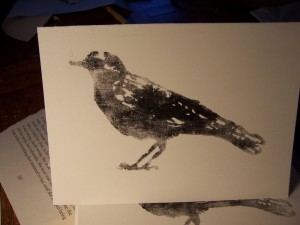
After I finished silkscreening my tee shirts, I wanted to see if I could use blockprinting ink on the silkscreen.

I had to wash the silkscreening ink off, and it specifically said that you mustn’t have any ink on the silk or you would ruin it, so I scrubbed fiercely.  I didn’t realize that the ink stained, and that part wouldn’t come off, so I ended up scrubbing some of the resist off. There were pinholes in it after I washed it. I also ended up washing loose the adhesive on the masking tape, so I had to use a paper as a block for the top of the card.

I did manage to answer the question that Google couldn’t answer for me, namely, “Can you use blockprinting ink on a silk screen?”  In a word: yes.  However, my first few prints had too much ink, and the images became unpleasantly smeared and dotted on the left side of the image.  These later ones are fine for cards, I think. They have an interesting fabric texture on them, and I like the inconsistency.

Posted in Printmaking, alternart | No Comments

Silkscreen Tee Shirt

April 22nd, 2011 by Kater

I often wear tee shirts, and almost all of my shirts have no logo or design on them at all.  Usually, that’s the way I like it.  However, I’ve been toying with the idea of having a design on my shirts.  A crow, naturally, since I like them so much.

I bought a silkscreening kit at Michael’s that came with a stencil and some fabric ink.  I didn’t want anything simple enough to be put on with a stencil, so I also bought the drawing and resist kit.  I thought about doing the photo emulsion kit, but this was cheaper. Besides, I wanted to do my own design, and I figured that drawing it directly on the silk would eliminate at least one step.

For those of you trying this at home, let me assure you that the drawing medium is not the easiest to work with.  It doesn’t want to get nearly as fine as I wanted it.  You have to brush it on, so fine lines are out of the question.  Still, I was able to paint this little crow onto the silk.  After you paint it on and let it dry, you squeegee the resist over the surface. I didn’t want to use an entire bottle of resist, so I blocked out some of the screen with masking tape.

After the resist dries, you run it under water until the drawing ink washes out.  At this point, it’s pretty much ready to go.  By applying a single pass with the ink, I was able to make pretty good prints onto my tee shirts.  I did a run of eight shirts, and then the ink started to get too viscous.

One problem I had was that the line at the top of the beak got covered over with resist, and therefore didn’t show up when I did the print.  Also, the later prints looked faded near the tail.  I used a paintbrush to touch up these areas. They have a handmade look, which I do not consider a defect here.

The directions say that you must heat set the image for 3-5 minutes on each side with an iron. I did that, but found that the cloth I used over it got scorched.  We’ll see how well it washes.

Posted in Printmaking, alternart | 1 Comment

Clarion Write-a-Thon Swag Magnets

April 18th, 2011 by Kater

These are a close-up of a set of magnets I made to donate to the Clarion Write-a-Thon efforts. They’re made from one of the keyboards donated to the Datamancer/Clarion Keyboard project.  Specifically, they’re from Walter Jon Williams’ keyboard.  I’m going to make a second set as well.

To make these, I started with bottlecaps that I’ve been saving. You can buy new bottlecaps for projects like this, but I think part of the charm is in reused items.  I cut circles of art paper for the background and glued them down. Then I mixed the resin.

I may have said before that mixing the resin is actually a bit tricky. You have to measure it exactly, using tiny disposable graduated cups that of course do not come with the resin kit and are not sold in any store.  (Fortunately, my dad gave me some.)  Then you have to pour both parts into a small disposable cup, but not a waxy dixie cup. Then you stir it with a clean stirring rod. Then you pour it into a new clean cup, and use a new clean stirring rod and mix it again.  Then you pour it into your mold. In my case, the bottlecaps.

One of the problems with this is that the keys are hollow underneath, and I had to insert them into the resin at an angle to get the airbubbles to leave.  Sometimes the resin poured over the side, and it’s quite sticky, so cleaning it takes care.  After I finished pouring the resin, I realized I had enough left for a few more bottlecaps, so I quickly cut out and glued more paper before the resin cured.  I left the resin to cure overnight. I don’t know how long it takes, but if you touch it before it’s cured, it will leave fingerprints, so it’s best to err on the side of caution.

After the resin cured, I mixed some metal epoxy to glue the magnets to the back.  One thing I love about making these is that you don’t need any clamps for the epoxy. The magnets hold themselves fast to the back of the bottlecap on their own.  I do have to make sure they aren’t too close while the epoxy is curing, or they will fasten to one another.   I would have preferred clear epoxy to this battleship gray epoxy; I used it because it said it was designed for metal, and I thought it might have a different chemical composition.

The magnets, and other donated swag, are going to be rewards for people who raise money for the Clarion Write-a-Thon this year.

Posted in alternart | 1 Comment

 
Wordpress Themes by and Website Templates by Blogcut