
I have a small coterie of good friends who are kind enough to give me editing or copyediting feedback on my novels. I try to give them some piece of art in exchange for their time. Three of my fellow Clarionites (Clarion Writer’s Workshop, San Diego 2007) read my upcoming book MULBERRY WANDS and gave me feedback. Keyan got an owl mask, Betsy got a freaky rabbit sculpture, and Drew as of yet hadn’t gotten anything. I asked him what he might like. He gave me a list of things he liked, including Pre-Raphaelite art and Amantia Muscaria, (which I had to look up.) I went through a bunch of different ideas as to what I was going to make for him, mostly involving woodburning the cover of a drawing box or covering an altoid’s tin with ornate polymer clay designs. But I didn’t feel like doing that right away, because I had some paperclay and I wanted to play with it.
I played with three different kinds of paperclay. The cheapest is by Crayola, and I think it’s called Model Magic. The second cheapest is the one I’ve always used, called Daas, which comes in a 1kg block in an orange and white foil wrapper. The more expensive one (which was still not the most expensive) is called creative paperclay, and was recommended on a site for making dolls.
Here’s what I found by doing a comparison of rolling, stamping, and painting these three clays. Daas is excellent for taking watercolor when it’s dried, as it has a higher paper content than the others. It’s also much stronger than the others. Except for that, it’s worse in every way. It has to be kneaded quite a bit to get to a workable state. It dries out quickly when you’re working with it, yet takes two or three times as long to get to a completely dry state as the others do. It absorbs a lot of water when it’s dry, so good luck covering it with cheap acrylics; you’ll need several coats.
Crayola’s model magic worked great. It’s cheap, pure white, takes detail well, dries quickly, takes paint just fine. I have heard that it turns to dust after a while, which is a major drawback if it’s true, but perhaps if it’s coated in acrylic paint, it’s okay.
Creative paperclay worked fine. Models just like a normal cone ten clay. Smooth, easy to work with, plastic texture, dries quickly. It is not sturdy when dried. Perhaps it is a smidge more sturdy than a normal greenware piece, but not demonstrably so. A tile made of this is as easy to snap in half as a saltine. Since my pieces aren’t handled excessively, this isn’t a huge drawback, but Creative Paperclay is also about ten bucks per kilogram. I could get a 25 pound bag of regular paperclay for maybe ten bucks, if I went to a pottery store instead of the arts and crafts subcategory on Amazon. Which makes me think that if I’m going to do more of these tiles, I might as well just get a big bag of paperclay. And at that point, I might as well fire them.
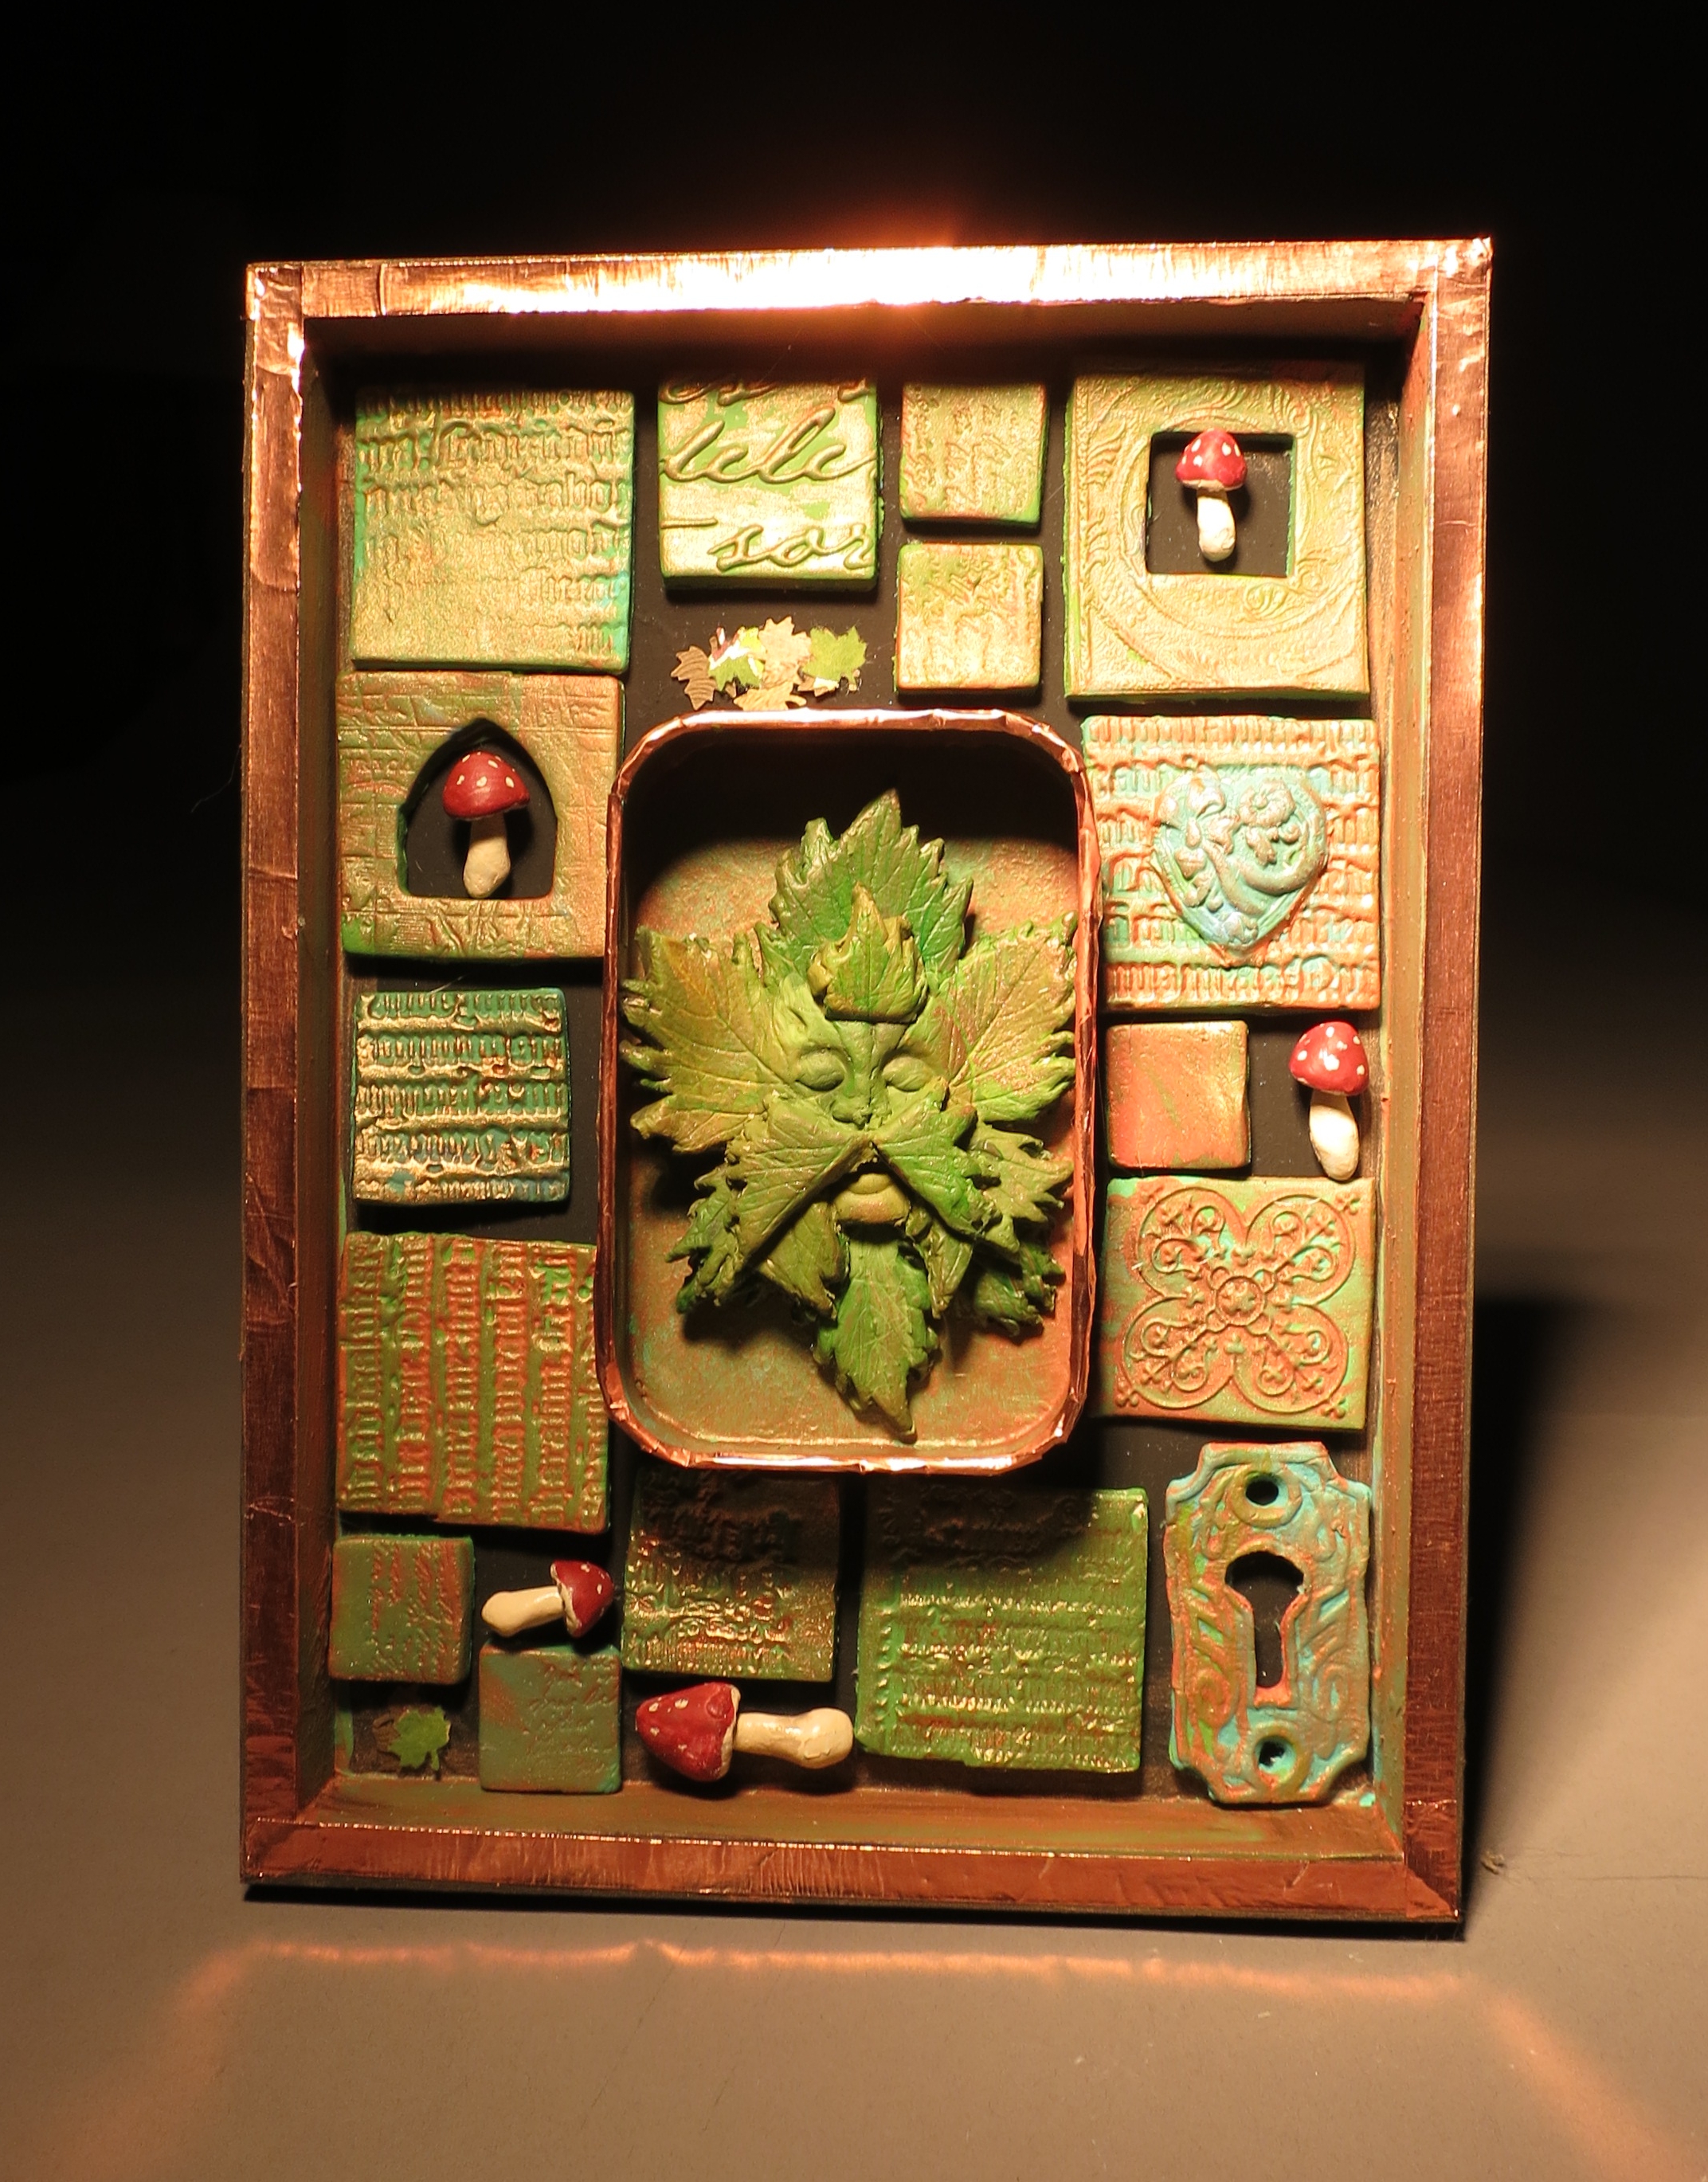
I molded the mushrooms by hand and painted them by hand. I learned that painting 3-D figures is not enjoyable, as you get paint all over your fingers and can’t do the whole piece in one go. The greenman was made with some sprig molds, some of grape leaves that I made myself from my grapevines, and one from a silicone press-mold of faces. I cut and assembledl them, then bent the leaves until it fit into the altoid’s tin.
Before I knew what I was going to do with these tiles, I just rolled them out and cut them and cut some with windows and stamped them with whatever seemed cool to me. Painting them all blue and green and a mixture of the two (except for the ones I was using for the other shrine, which you’ll see in a few weeks) was a good base coat for copper. Then I realized that I’d already done a shrine with this color scheme, the one with the fish. But that one was mostly polymer clay. With that one, I’d used blue and green clay, and rubbed it with paint and mica pigments. doing a subtle overlay of metallic paint is harder on a porous, painted surface than on an intrinsically-hued smooth non-porous surface. Using a make-up sponge brush, I managed to get more or less the texture I wanted (except for the tiles made of DAAS clay, which were too absorbent)
I’d already painted this box with black gesso, then painted the inside of the tin blue-green, then daubed copper paint over that and over the inside of the box. It had a subtle copper color, but not as intense as I’d hoped for. Enter my friend, copper tape. This is thin sheets of copper, no thicker than aluminum foil, on a roll, with adhesive on one side like tape. It’s used to cover pieces of glass that you’re going to solder together. Like metallic duct tape, it’s one of those completely functional things that’s too pretty not to use on its own sometimes.