
 I started out just making a lot of pieces for shrine boxes. Making these boxes is a technique I learned from a book called “Creating Personal Shrines” by Carol Owen. Basically, you paint both sides of foamcore with acrylic (or gesso? Maybe gesso works too) and let it dry. Then you glue ricepaper to each piece, wrapping it entirely. These lightweight, porous-surfaced tiles make strong boxes that take paint perfectly. She has patterns in her book, though I prefer to create my own.
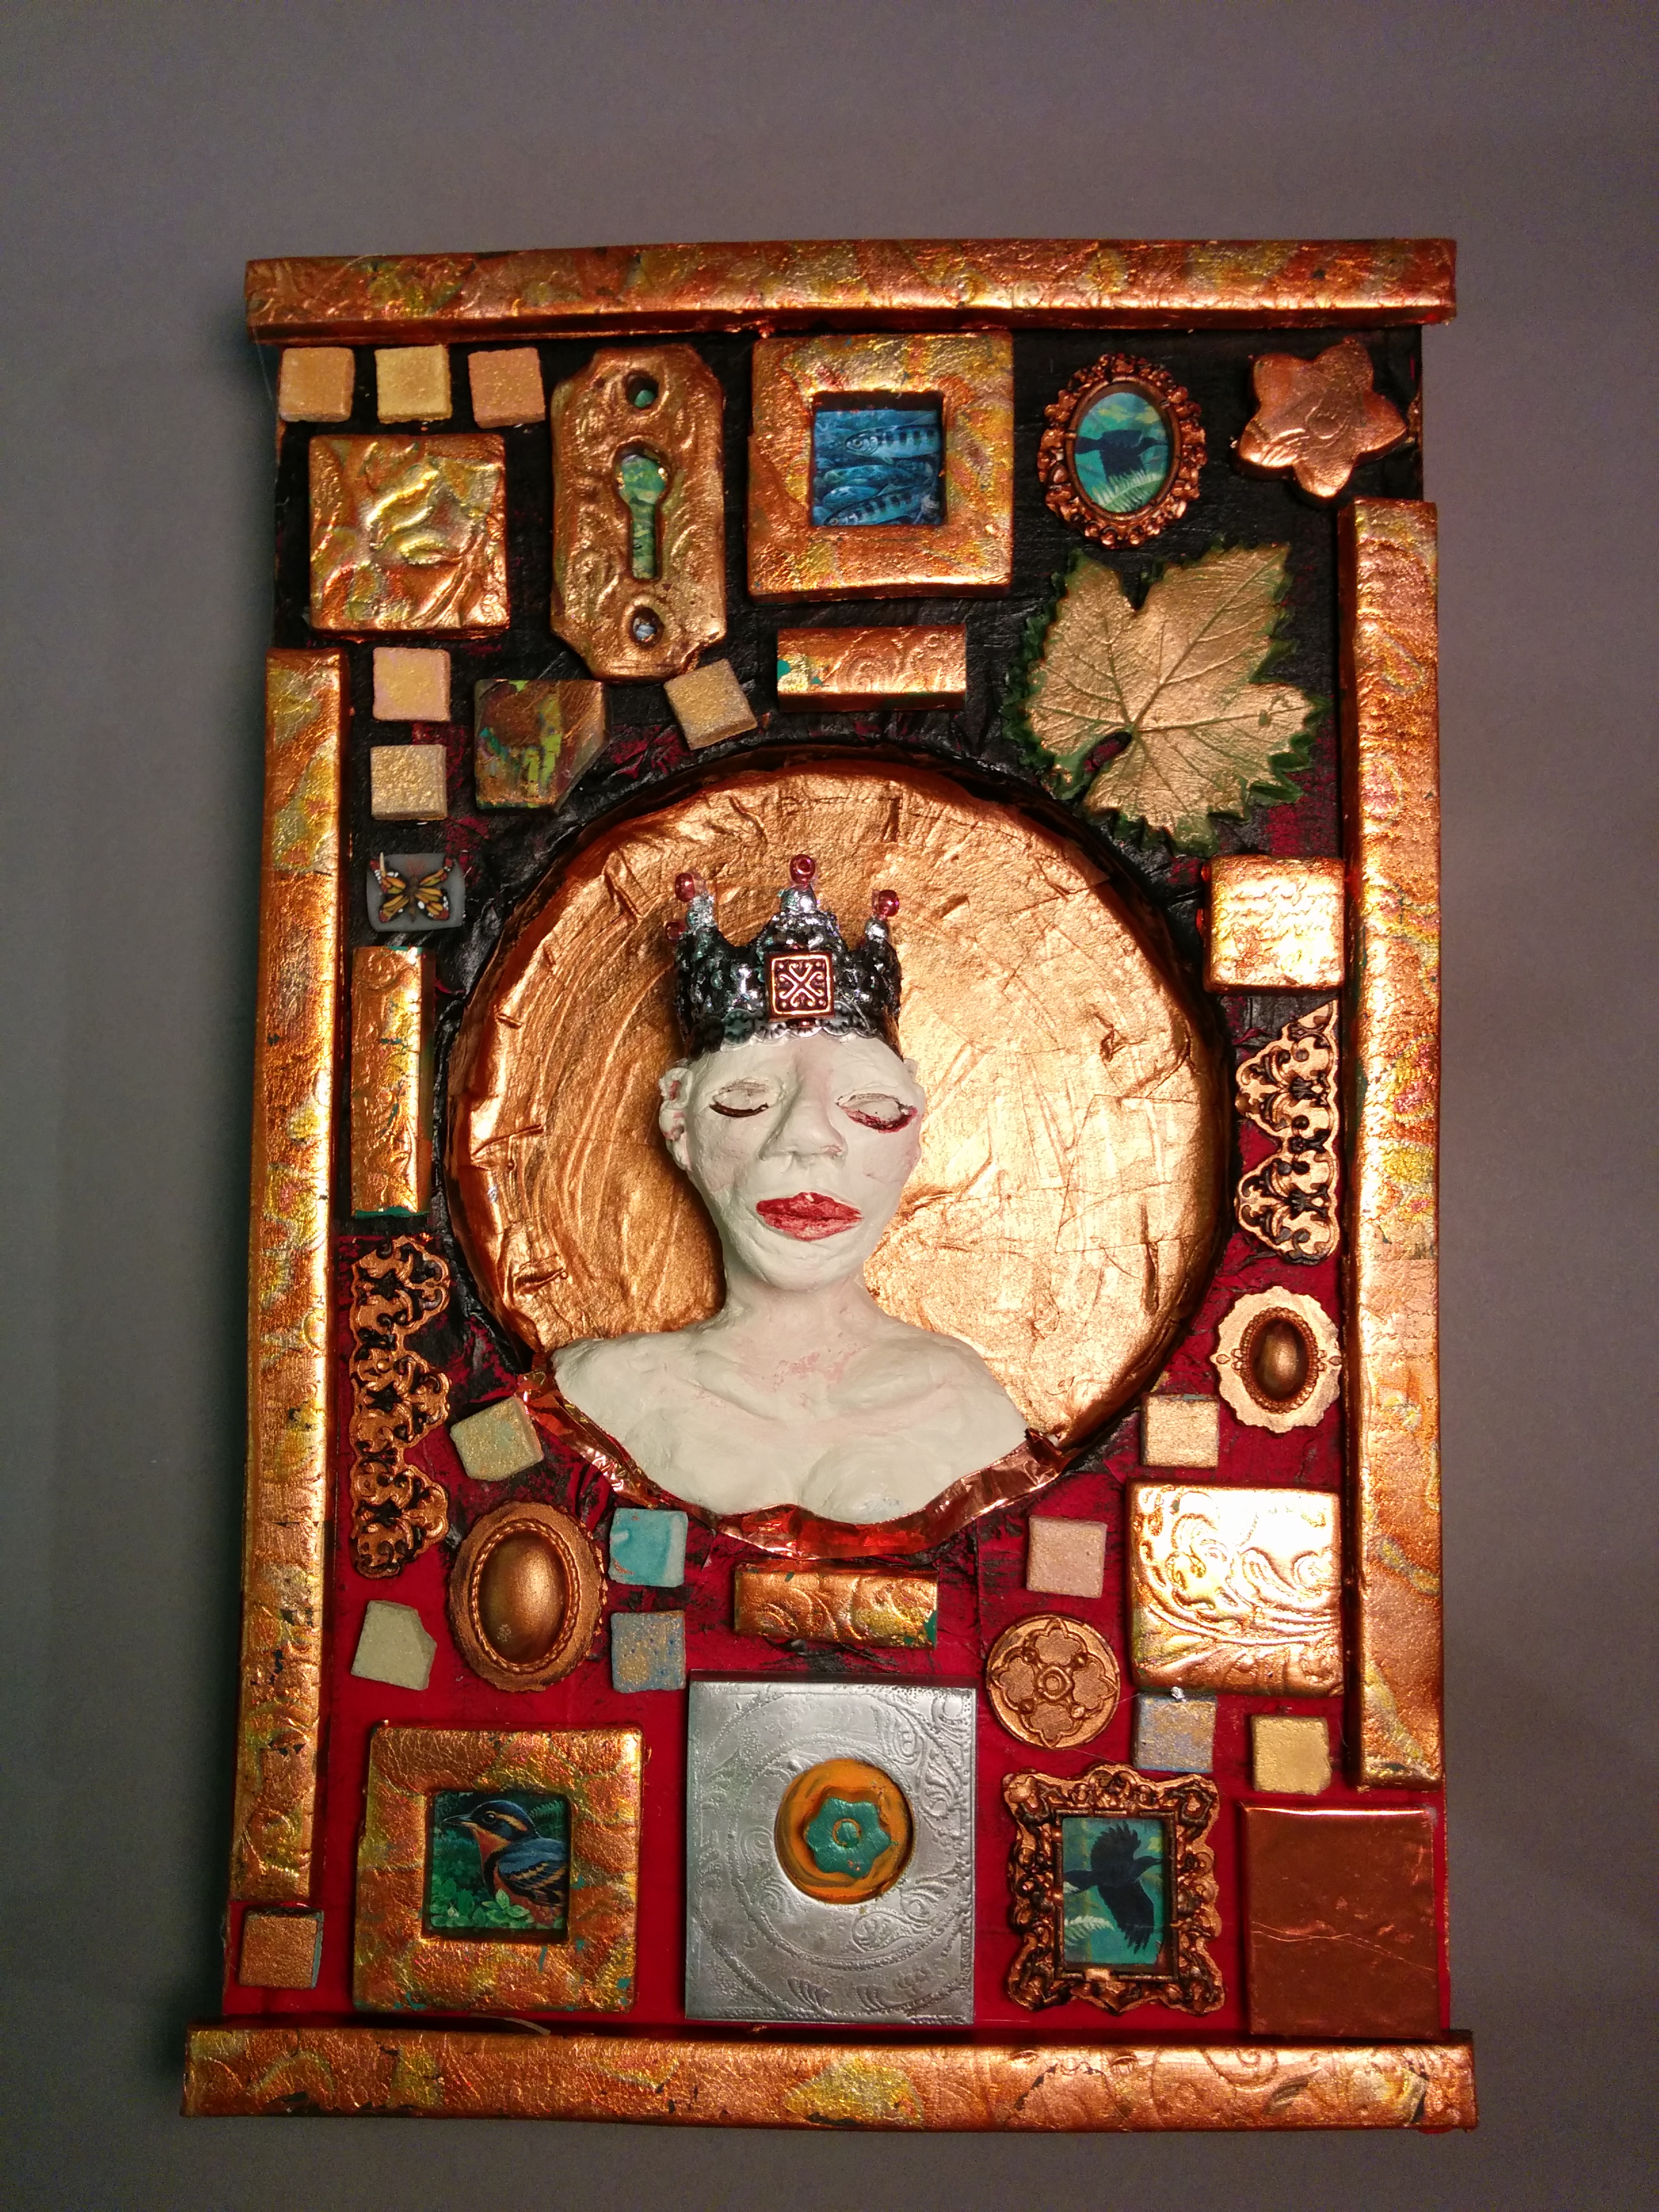
For this one, I made the circle in the center by attaching a half a tin and then adhering strips of rice paper over and over and over until it stayed in shape. I poked a hole in the bottom of the tin for the armature for the face sculpture, which is made of paperclay.
I dry-fitted the tiles (made in a previous session) over and over and over again until I came up with a design I liked. Then I painted the ombre-black to red background and assembled the tiles on. Most of the tiles are polymer clay, but some are paperclay, and some are casting plaster. The crows and other forest scenes are from the background image of a sheet of souvenir stamps.
After I assembled and glued all the tiles down, I had to fix the center sculpture. I put copper tape (from stained glass supply) over the seam where her bust had shrunk away from the edge. I painted her so she wasn’t so monotone, and then I made the crown out of hot glue. Yes, hot glue. It’s flexible, sturdy, and most importantly, it takes silver or gold leaf perfectly, if you catch it while it’s still warm. I painted over it with acrylic to fill in the details, and added the copper beads on the crown points afterwards.
I intend to do a lot more small heads and faces, because I would like to get a lot better at sculpting.